Difference between revisions of "Administrator user manual"
(→Mistake types) |
|||
| (172 intermediate revisions by 2 users not shown) | |||
| Line 7: | Line 7: | ||
*'''compare''' unedited translation made by a translator with edited version received from an editor; | *'''compare''' unedited translation made by a translator with edited version received from an editor; | ||
| − | *'''generate | + | *'''generate''' a [[Comparison report|comparison report]]; |
| − | *'''classify''' each correction by mistake type and severity, thus allowing to get the translation quality evaluation score | + | *'''classify''' each correction by mistake type and severity, thus allowing to get the translation quality evaluation score; |
| − | *ensure '''anonymous communication''' between | + | *ensure '''anonymous communication''' between the translator, evaluator and arbiter regarding mistakes classification; |
*'''automate a process''' of maintaining the evaluation project; | *'''automate a process''' of maintaining the evaluation project; | ||
| − | *'''save''' all evaluated translations '''in the database''' and create | + | *'''save''' all evaluated translations '''in the database''' and create translation quality reports both on each individual user and the whole company. |
| − | you can '''create the list of top translators''' with the highest score, '''see dynamics of quality''' per individual translator by month, etc. | + | *you can '''create the list of top translators''' with the highest score, '''see dynamics of quality''' per individual translator by month, etc. |
| − | =='''Quick | + | =='''[[Quick comparison]]'''== |
| − | You can compare two versions of | + | You can compare two versions of the translation without registering an account. |
| − | 1. Go to '''<U> <span style="background-color:yellow">[https://tqauditor.com https://tqauditor.com]</span> </U>''' and click '''"Compare files"''': | + | 1. Go to '''<U> <span style="background-color:yellow">[https://tqauditor.com https://tqauditor.com]</span></U>''' and click '''"Compare files"''': |
[[File:Tq.png|border|570px]] | [[File:Tq.png|border|570px]] | ||
| − | It will open the '''Quick | + | It will open the '''Quick comparison''' page. |
2. Choose the translated and reviewed files, and click the '''"Update selected files"''' button: | 2. Choose the translated and reviewed files, and click the '''"Update selected files"''' button: | ||
| Line 33: | Line 33: | ||
[[File:Compare.png|border|300px]] | [[File:Compare.png|border|300px]] | ||
| − | ''' | + | ::<span style="color:orange">'''Note:'''</span> TQAuditor accepts bilingual files of different formats (Helium, XLF, XLZ, SDLXliff, TTX, TMX etc.). Click "[[Quick_comparison#Upload_files|Supported bilingual file types]]" on the "Upload files" page to see all the file formats TQA work with. |
3. The '''Comparison report''' page will be displayed: | 3. The '''Comparison report''' page will be displayed: | ||
| Line 41: | Line 41: | ||
[[File:Redirect.jpg|40px|link=User manual]] Back to the '''table of contents'''. | [[File:Redirect.jpg|40px|link=User manual]] Back to the '''table of contents'''. | ||
| − | ==='''Quick | + | ==='''Quick comparison details'''=== |
| − | + | You can delete the comparison report by clicking a corresponding button: | |
| − | |||
| − | |||
[[File:1 delete comparison.png|border|170px]] | [[File:1 delete comparison.png|border|170px]] | ||
| − | + | You may also upload files for a new comparison report by clicking "Upload files". An existing comparison report will be deleted. | |
[[File:2 upload files.png|border|170px]] | [[File:2 upload files.png|border|170px]] | ||
| − | + | ==='''Markup display'''=== | |
| − | :* | + | Markup display settings allow you to choose how tags will be displayed: |
| + | |||
| + | *"Full" — tags have original length, so you can see data within: | ||
[[File:1 full.png|border|140px]] [[File:1.png|border|650px]] | [[File:1 full.png|border|140px]] [[File:1.png|border|650px]] | ||
| − | + | *"Short" — the contents of the tags are not displayed and you see only their position in the text: | |
[[File:2 short.png|border|140px]] [[File:2.png|border|350px]] | [[File:2 short.png|border|140px]] [[File:2.png|border|350px]] | ||
| − | + | *"None" — tags are not displayed: | |
[[File:3 none.png|border|140px]] [[File:3.png|border|270px]] | [[File:3 none.png|border|140px]] [[File:3.png|border|270px]] | ||
| − | + | ==='''Units display'''=== | |
| − | + | *"All" — units with and without corrections are displayed: | |
[[File:1 all.png|border|150px]] [[File:1 all text .png|border|350px]] | [[File:1 all.png|border|150px]] [[File:1 all text .png|border|350px]] | ||
| − | + | *"With corrections" — only units with corrections are displayed: | |
[[File:2 with corrections.png|border|150px]] [[File:2. not all .png|border|350px]] | [[File:2 with corrections.png|border|150px]] [[File:2. not all .png|border|350px]] | ||
| − | |||
| − | |||
| − | |||
| − | |||
[[File:Redirect.jpg|40px|link=User manual]] Back to the '''table of contents'''. | [[File:Redirect.jpg|40px|link=User manual]] Back to the '''table of contents'''. | ||
| Line 85: | Line 81: | ||
=='''Register an account'''== | =='''Register an account'''== | ||
| − | + | To use the full functionality of the system, you have to register an account. It will allow you to create projects and manage project participants, enable discussion between the translator and editor, get the quality score of translations, add users to your company account, generate detailed reports, and set up the quality standard for your company. | |
| − | 1. Go to | + | 1. Go to [https://tqauditor.com tqauditor.com] and click "Sign up": |
[[File:Sign up.png|border|550px]] | [[File:Sign up.png|border|550px]] | ||
| − | 2. | + | 2. Fill in the information, read Terms of Service and Privacy Policy, mark the checkbox, and click the "Submit" button: |
[[File:Screenshot 2.png|border|280px]] | [[File:Screenshot 2.png|border|280px]] | ||
| Line 99: | Line 95: | ||
=='''Add users'''== | =='''Add users'''== | ||
| − | You can add users manually | + | You can add users manually or import a users list from an Excel file. |
| − | + | ==='''Add users manually'''=== | |
1. To add a new user, go to '''Users → New user''': | 1. To add a new user, go to '''Users → New user''': | ||
| Line 107: | Line 103: | ||
[[File:Add users.png|border|170px]] | [[File:Add users.png|border|170px]] | ||
| − | 2. Fill in all the fields and | + | 2. Fill in all the fields and click the "'''Create'''" button: |
[[File:Eva apple.png|border|170px]] | [[File:Eva apple.png|border|170px]] | ||
| − | <span style="color: | + | ::<span style="color:orange"> '''Note''': </span> only users with the marked '''"Can log in"''' checkbox can get the invitation email and complete registration, use the system and get email notifications. If the "Can log in" checkbox is unmarked, the invitation email will not be sent. |
You may also edit '''<U>[[User details page|user details]]</U>''' by clicking the user's ID: | You may also edit '''<U>[[User details page|user details]]</U>''' by clicking the user's ID: | ||
| Line 117: | Line 113: | ||
[[File:Screenshot 23.png|border|900px]] | [[File:Screenshot 23.png|border|900px]] | ||
| − | There are 4 | + | There are 4 roles in the system: translator, evaluator, manager, and administrator. |
| − | |||
| − | |||
| − | |||
| − | |||
| − | + | ==='''Import users from Excel'''=== | |
| − | |||
| − | |||
| − | |||
| − | |||
If you already have the list of users with their contact info, you can easily import it without the need to enter such information manually. | If you already have the list of users with their contact info, you can easily import it without the need to enter such information manually. | ||
| Line 137: | Line 125: | ||
For more detailed instructions on users import, please see the '''<U>[[Import users from Excel]]</U>''' page. | For more detailed instructions on users import, please see the '''<U>[[Import users from Excel]]</U>''' page. | ||
| − | When all users are added, you can start | + | ::<span style="color:orange">'''Note:'''</span> only an account owner can import users from Excel. |
| + | |||
| + | When all users are added, you can start creating projects and managing project participants. | ||
[[File:Redirect.jpg|40px|link=User manual]] Back to the '''table of contents'''. | [[File:Redirect.jpg|40px|link=User manual]] Back to the '''table of contents'''. | ||
| − | =='''Create project'''== | + | =='''[[New project|Create project]]'''== |
1. Go to '''Projects → New project''': | 1. Go to '''Projects → New project''': | ||
| Line 155: | Line 145: | ||
[[File:Prdoject ID.png|border|1000px]] | [[File:Prdoject ID.png|border|1000px]] | ||
| − | + | The manager can edit project details, download files, reassign project participants, clone or delete the project. | |
[[File:Project details.png|border|500px]] | [[File:Project details.png|border|500px]] | ||
| − | <span style="color: | + | ::<span style="color:orange">'''Note:'''</span> only the evaluator can upload files. |
[[File:Redirect.jpg|40px|link=User manual]] Back to the '''table of contents'''. | [[File:Redirect.jpg|40px|link=User manual]] Back to the '''table of contents'''. | ||
| Line 165: | Line 155: | ||
=='''Create comparison report'''== | =='''Create comparison report'''== | ||
| − | After | + | After getting an email notification from the system the assigned evaluator has to compare the original and reviewed versions of a translation. |
1. The evaluator uploads files: | 1. The evaluator uploads files: | ||
| Line 171: | Line 161: | ||
[[File:1 ev upload files.png|border|230px]] | [[File:1 ev upload files.png|border|230px]] | ||
| − | 2. When done, | + | 2. When done, the evaluator can create the comparison report: |
[[File:Create comparison reevport.png|border|230px]] | [[File:Create comparison reevport.png|border|230px]] | ||
| − | Then | + | 3. Then the evaluator can start the evaluation whether with an automatic or manual word count. |
==='''Start evaluation (automatic word count)'''=== | ==='''Start evaluation (automatic word count)'''=== | ||
| Line 185: | Line 175: | ||
[[File:1 automaic.png|border|220px]] | [[File:1 automaic.png|border|220px]] | ||
| − | + | The evaluation settings can be configured: | |
| − | * | + | *"Skip repetitions" — the system will hide repeated segments (only one of them will be displayed) |
| − | * | + | *"Skip locked units" — the "frozen" units will not be displayed (for example, this setting is used if a client wants some important parts of the translated text to stay unchanged). |
| − | * | + | *"Skip units with match >=" — units with matches greater than or equal to a specified number will not be displayed. |
| − | * | + | *"Evaluation sample word count limit" — this value is used to adjust how many segments for evaluation will be displayed. |
Click "'''Start evaluation'''": | Click "'''Start evaluation'''": | ||
| Line 202: | Line 192: | ||
If the word count given by the system does not correspond to the word count you want, you may manually enter the total word count before starting evaluation. | If the word count given by the system does not correspond to the word count you want, you may manually enter the total word count before starting evaluation. | ||
| + | |||
| + | If this option is applied, all the corrected units will be displayed. | ||
Click Start evaluation (manual word count): | Click Start evaluation (manual word count): | ||
| Line 210: | Line 202: | ||
[[File:1. start evaluation.png|border|700px]] | [[File:1. start evaluation.png|border|700px]] | ||
| − | |||
| − | |||
==='''Quality evaluation'''=== | ==='''Quality evaluation'''=== | ||
| Line 225: | Line 215: | ||
[[File:2. mistake.png|border|280px]] | [[File:2. mistake.png|border|280px]] | ||
| − | + | The evaluator can add mistakes, edit existing mistakes and comments or delete them by clicking the corresponding buttons: | |
[[File:3. mistal.png|border|800px]] | [[File:3. mistal.png|border|800px]] | ||
| − | When the mistakes | + | When the mistakes classification is done, the evaluator has to click "Complete evaluation", write an evaluation summary, and click the "Complete" button. Then, the translator will get a notification of evaluation completion and a quality assessment report. |
| − | + | Please note that any project participant can export the evaluation report. | |
| − | |||
| − | Please note that | ||
[[File:Redirect.jpg|40px|link=User manual]] Back to the '''table of contents'''. | [[File:Redirect.jpg|40px|link=User manual]] Back to the '''table of contents'''. | ||
| Line 239: | Line 227: | ||
==='''Complete evaluation'''=== | ==='''Complete evaluation'''=== | ||
| − | When | + | When all the mistakes are added and classified, click "Complete evaluation", write an evaluation summary, and click the "Complete" button. The translator will receive an email notification of quality evaluation completion and will be able to review the evaluation report. |
[[File:1 complete evaluation.png|border|530px]] | [[File:1 complete evaluation.png|border|530px]] | ||
| − | |||
| − | |||
[[File:Redirect.jpg|40px|link=User manual]] Back to the '''table of contents'''. | [[File:Redirect.jpg|40px|link=User manual]] Back to the '''table of contents'''. | ||
| − | + | ==='''Translator's review'''=== | |
| − | |||
| − | |||
| − | |||
| − | ==='''Translator | ||
| − | |||
| − | |||
| − | + | Once the translator receives the email notification of '''<u>[[Comparison report| сomparison report]]</u>''' creation, they can review all the corrections made by the reviewer. | |
| − | + | When the '''<u>[[evaluation report| evaluation report]]</u>''' is created, the translator can review the mistakes classification. | |
| − | + | If the translator agrees with the mistakes classification, they click "Complete project". The project and its evaluation score will be finalized at this stage: | |
| − | |||
| − | |||
[[File:Complete tr.png|border|200px]] | [[File:Complete tr.png|border|200px]] | ||
| − | If the translator does not agree with the classification | + | If the translator does not agree with the mistakes classification, they can ask the evaluator to decrease a mistake severity. To do so, they click "Add comment" in the box of the mistake, write a comment clarifying the matter and click "Submit": |
| − | |||
| − | |||
[[File:Misatake comment.png|border|700px]] | [[File:Misatake comment.png|border|700px]] | ||
| − | + | Once the translator enters all the comments, they request the reevaluation. | |
[[File:Request reevaluation.png|border|200px]] | [[File:Request reevaluation.png|border|200px]] | ||
| − | + | ::<span style="color:orange">'''Note:'''</span> The ability to request the reevaluation (and how many times) depends on the account [[Evaluation settings|evaluation settings]]. | |
| − | + | If the translator still does not agree, they can request arbitration (the corresponding button appears instead of "Request reevaluation"): | |
[[File:Arb.png|border|220px]] | [[File:Arb.png|border|220px]] | ||
| − | + | The arbiter will provide a final score that cannot be disputed. | |
| − | |||
| − | |||
| − | |||
| − | |||
| − | |||
| − | |||
| − | |||
| − | |||
| − | |||
| − | |||
| − | |||
| − | |||
| − | |||
| − | |||
| − | |||
| − | |||
| − | |||
| − | |||
| − | |||
| − | |||
| − | |||
| − | |||
| − | |||
| − | |||
| − | |||
| − | |||
| − | |||
| − | |||
| − | |||
| − | |||
| − | |||
| − | |||
=='''Projects filters'''== | =='''Projects filters'''== | ||
| − | + | You can use filters on the "'''<U>[[Projects list#Additional filters|Projects list]]</U>'''" page. | |
[[File:1 f.png|border|170px]] [[File:2 fil.png|border|170px]] | [[File:1 f.png|border|170px]] [[File:2 fil.png|border|170px]] | ||
| − | + | To sort the projects by the needed criteria, please click any column name highlighted in blue. | |
| − | [[ | + | When the projects are sorted, you will see the arrow [[file:Line up arrow.jpg|border|25px]] button next to the corresponding column name: |
| − | + | [[File:1.2 project list.png|border|1000px]] | |
[[File:Redirect.jpg|40px|link=User manual]] Back to the '''table of contents'''. | [[File:Redirect.jpg|40px|link=User manual]] Back to the '''table of contents'''. | ||
| Line 331: | Line 275: | ||
=='''Reports'''== | =='''Reports'''== | ||
| − | You can generate various reports | + | You can generate various reports. Click the '''Reports''' menu on the top panel: |
[[File:Reports.png|border|450px]] | [[File:Reports.png|border|450px]] | ||
| − | Users with the | + | Users with the "translator" role can access only their individual translation quality reports. |
| − | |||
| − | |||
| − | |||
| − | |||
| − | |||
| − | |||
| − | |||
| − | |||
| − | |||
| − | |||
| − | + | Users with the "evaluator" role can access their individual translation quality reports and evaluator reports: | |
| − | + | Users with the "manager" and "administrator" roles can access both their individual reports and other translators' and evaluators' reports. | |
| − | + | ==='''The list of all available reports'''=== | |
| − | *''' | + | *Average score reports. Here you may see the average reports: per '''<U>[[Average score per translator|translator]]</U>''' and '''<U>[[Average score per translator company|per translator company]]</U>''', per '''<U>[[Average score per evaluator|evaluator]]</U>''' and '''<U>[[Average score per evaluator company|per evaluator company]]</U>''', per '''<U>[[Average score per manager|manager]]</U>''' and '''<U>[[Average score per manager company|per manager company]]</U>''', per '''<U>[[Average score per specialization|specialization]]</U>'''. |
| − | On this page, you will find information about every | + | *Translator reports. On this page, you will find information about every translator. For more details, please see the '''<U>[[Translator report]]</U>''' page. |
| − | For more details, please see the '''<U>[[Evaluator report]]</U>''' page. | + | *Evaluator reports. On this page, you will find information about every evaluator. For more details, please see the '''<U>[[Evaluator report]]</U>''' page. |
| − | *'''Translator company report''' | + | *Translator company reports. On this page, you will find information about every translator company. For more details, please see the '''<U>[[Translator company report]]</U>''' page. |
| − | *'''Evaluator company report''' | + | *Evaluator company report. On this page, you will find information about every evaluator company. For more details, please see the '''<U>[[Evaluator company report]]</U>''' page. |
[[File:Redirect.jpg|40px|link=User manual]] Back to the '''table of contents'''. | [[File:Redirect.jpg|40px|link=User manual]] Back to the '''table of contents'''. | ||
| Line 367: | Line 301: | ||
=='''System settings'''== | =='''System settings'''== | ||
| − | You can | + | You can adjust account settings and specify system values in the "System" menu: |
[[File:System settings.png|border|150px]] | [[File:System settings.png|border|150px]] | ||
| Line 391: | Line 325: | ||
[[File:Cliednt list.png|border|800px]] | [[File:Cliednt list.png|border|800px]] | ||
| − | <span style="color: | + | <span style="color:orange">'''Note:''' </span> You can’t delete a client connected with projects. Just select the unneeded client by pressing "'''Edit'''" and uncheck the "'''Enabled'''" box. It will not appear in the drop-down list anymore. |
*'''New client''' — here you can add a new client by pressing the '''"Create"''' button: | *'''New client''' — here you can add a new client by pressing the '''"Create"''' button: | ||
| Line 409: | Line 343: | ||
[[File:Langduages list.png|border|800px]] | [[File:Langduages list.png|border|800px]] | ||
| − | <span style="color: | + | :<span style="color:orange">'''Note:''' </span> You can’t delete a language connected with projects. Just select the unneeded language by pressing "'''Edit'''" and uncheck the "'''Enabled'''" box. It will not appear in the drop-down list anymore. |
*'''New language''' — here you can add a new language pair by pressing the '''"Add"''' button: | *'''New language''' — here you can add a new language pair by pressing the '''"Add"''' button: | ||
| Line 429: | Line 363: | ||
[[File:1 specializationfs.png|border|400px]] | [[File:1 specializationfs.png|border|400px]] | ||
| − | <span style="color: | + | <span style="color:orange">'''Note:''' </span> You can’t delete specializations connected with projects. Just select the unneeded specialization by pressing "'''Edit'''" and uncheck the "'''Enabled'''" box. It will not appear in the drop-down list anymore. |
*'''New specialization''' — here you may add a new specialization by pressing the '''"Create"''' button: | *'''New specialization''' — here you may add a new specialization by pressing the '''"Create"''' button: | ||
| Line 467: | Line 401: | ||
[[File:Mistakse severities list.jpg|border|480px]] | [[File:Mistakse severities list.jpg|border|480px]] | ||
| − | <span style="color: | + | :<span style="color:orange">'''Note:''' </span>You can’t delete mistake severities connected with projects. Just select the unneeded mistake severity by pressing "'''Edit'''" and uncheck the "'''Enabled'''" box. It will not appear in the drop-down list anymore. |
*'''New mistake severity''' - here you may add a new mistake severity by pressing the '''"Create"''' button: | *'''New mistake severity''' - here you may add a new mistake severity by pressing the '''"Create"''' button: | ||
| Line 487: | Line 421: | ||
[[File:Mistcake types list.jpg|border|450px]] | [[File:Mistcake types list.jpg|border|450px]] | ||
| − | <span style="color: | + | :<span style="color:orange">'''Note:'''</span> You can’t delete mistake types connected with projects. Just select the unneeded mistake by pressing '''"Edit"''' and uncheck the "'''Enabled'''" box. It will not appear in the drop-down list anymore. |
*'''New mistake type''' - here you may add a new mistake type by pressing the '''"Create"''' button: | *'''New mistake type''' - here you may add a new mistake type by pressing the '''"Create"''' button: | ||
| Line 509: | Line 443: | ||
[[File:1quality.png|border|800px]] | [[File:1quality.png|border|800px]] | ||
| − | <span style="color: | + | :<span style="color:orange">'''Note:'''</span> You can’t remove quality levels connected with projects. |
[[File:Redirect.jpg|40px|link=User manual]] Back to the '''table of contents''' | [[File:Redirect.jpg|40px|link=User manual]] Back to the '''table of contents''' | ||
Latest revision as of 15:18, 12 July 2022
For a brief overview of the system, please check this video: ![]()
Contents
About TQAuditor
TQAuditor 3.04 is the system that evaluates and monitors translation quality and allows you to:
- compare unedited translation made by a translator with edited version received from an editor;
- generate a comparison report;
- classify each correction by mistake type and severity, thus allowing to get the translation quality evaluation score;
- ensure anonymous communication between the translator, evaluator and arbiter regarding mistakes classification;
- automate a process of maintaining the evaluation project;
- save all evaluated translations in the database and create translation quality reports both on each individual user and the whole company.
- you can create the list of top translators with the highest score, see dynamics of quality per individual translator by month, etc.
Quick comparison
You can compare two versions of the translation without registering an account.
1. Go to https://tqauditor.com and click "Compare files":
It will open the Quick comparison page.
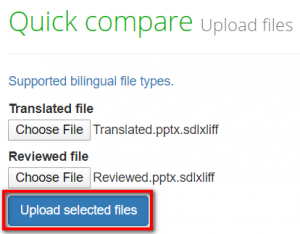
2. Choose the translated and reviewed files, and click the "Update selected files" button:
- Note: TQAuditor accepts bilingual files of different formats (Helium, XLF, XLZ, SDLXliff, TTX, TMX etc.). Click "Supported bilingual file types" on the "Upload files" page to see all the file formats TQA work with.
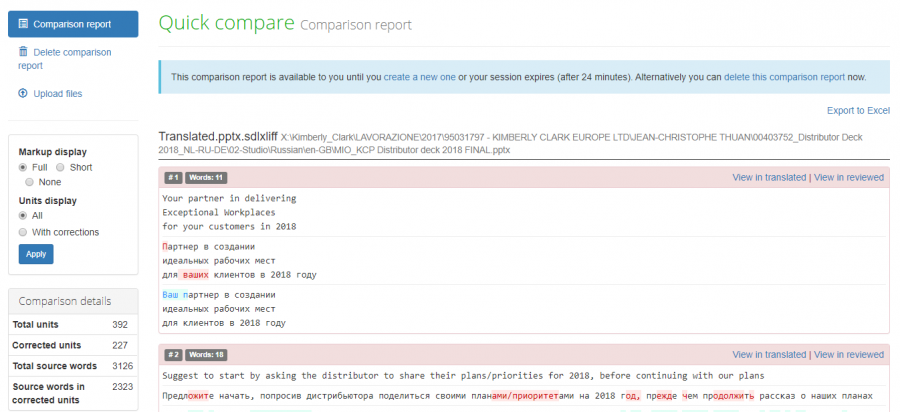
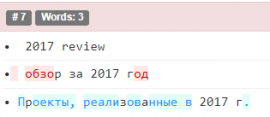
3. The Comparison report page will be displayed:
![]() Back to the table of contents.
Back to the table of contents.
Quick comparison details
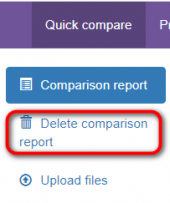
You can delete the comparison report by clicking a corresponding button:
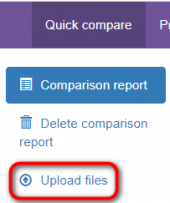
You may also upload files for a new comparison report by clicking "Upload files". An existing comparison report will be deleted.
Markup display
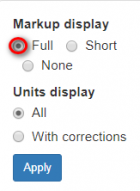
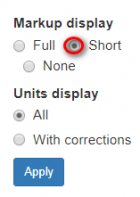
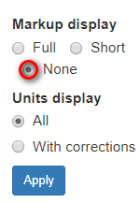
Markup display settings allow you to choose how tags will be displayed:
- "Full" — tags have original length, so you can see data within:
- "Short" — the contents of the tags are not displayed and you see only their position in the text:
- "None" — tags are not displayed:
Units display
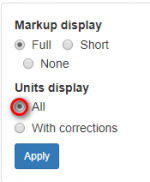
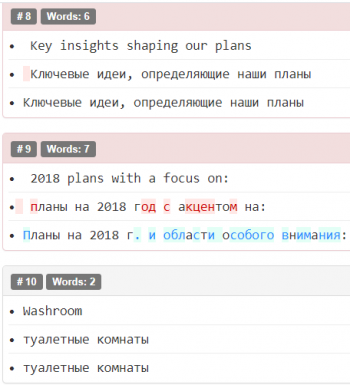
- "All" — units with and without corrections are displayed:
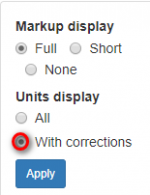
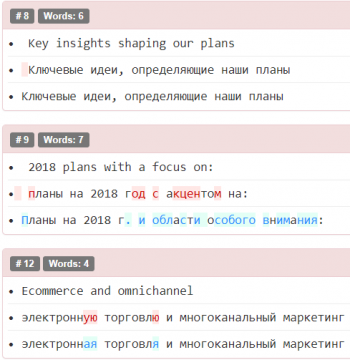
- "With corrections" — only units with corrections are displayed:
![]() Back to the table of contents.
Back to the table of contents.
Register an account
To use the full functionality of the system, you have to register an account. It will allow you to create projects and manage project participants, enable discussion between the translator and editor, get the quality score of translations, add users to your company account, generate detailed reports, and set up the quality standard for your company.
1. Go to tqauditor.com and click "Sign up":
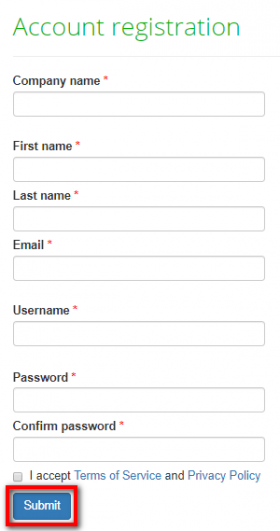
2. Fill in the information, read Terms of Service and Privacy Policy, mark the checkbox, and click the "Submit" button:
![]() Back to the table of contents.
Back to the table of contents.
Add users
You can add users manually or import a users list from an Excel file.
Add users manually
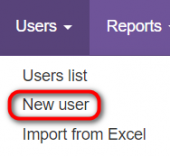
1. To add a new user, go to Users → New user:
2. Fill in all the fields and click the "Create" button:
- Note: only users with the marked "Can log in" checkbox can get the invitation email and complete registration, use the system and get email notifications. If the "Can log in" checkbox is unmarked, the invitation email will not be sent.
You may also edit user details by clicking the user's ID:
There are 4 roles in the system: translator, evaluator, manager, and administrator.
Import users from Excel
If you already have the list of users with their contact info, you can easily import it without the need to enter such information manually.
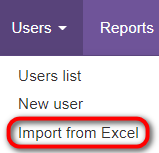
To do so, go to Users → Import from Excel:
For more detailed instructions on users import, please see the Import users from Excel page.
- Note: only an account owner can import users from Excel.
When all users are added, you can start creating projects and managing project participants.
![]() Back to the table of contents.
Back to the table of contents.
Create project
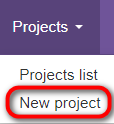
1. Go to Projects → New project:
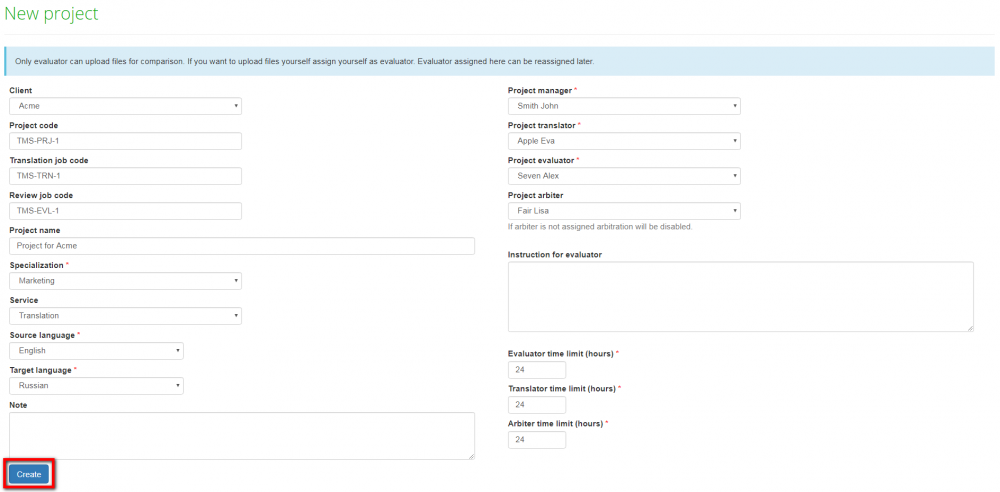
2. Enter the required information and press the "Create" button:
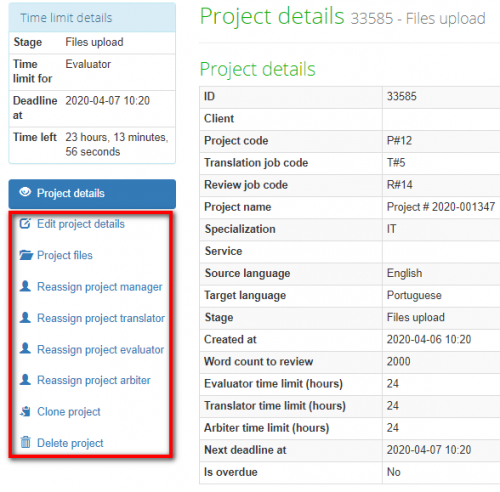
3. To check the project details, select the ID number:
The manager can edit project details, download files, reassign project participants, clone or delete the project.
- Note: only the evaluator can upload files.
![]() Back to the table of contents.
Back to the table of contents.
Create comparison report
After getting an email notification from the system the assigned evaluator has to compare the original and reviewed versions of a translation.
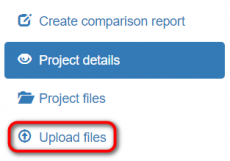
1. The evaluator uploads files:
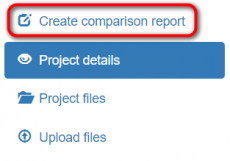
2. When done, the evaluator can create the comparison report:
3. Then the evaluator can start the evaluation whether with an automatic or manual word count.
Start evaluation (automatic word count)
If you select this option, the system will display randomly selected segments containing only corrected units for evaluation.
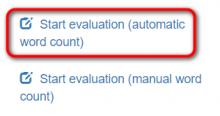
Click Start evaluation (automatic word count):
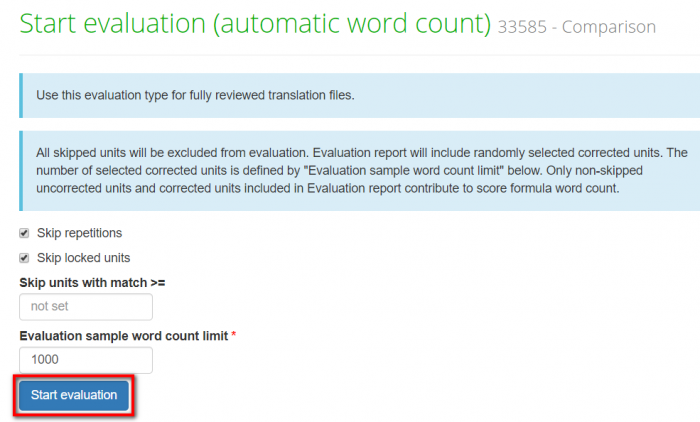
The evaluation settings can be configured:
- "Skip repetitions" — the system will hide repeated segments (only one of them will be displayed)
- "Skip locked units" — the "frozen" units will not be displayed (for example, this setting is used if a client wants some important parts of the translated text to stay unchanged).
- "Skip units with match >=" — units with matches greater than or equal to a specified number will not be displayed.
- "Evaluation sample word count limit" — this value is used to adjust how many segments for evaluation will be displayed.
Click "Start evaluation":
Start evaluation (manual word count)
If the word count given by the system does not correspond to the word count you want, you may manually enter the total word count before starting evaluation.
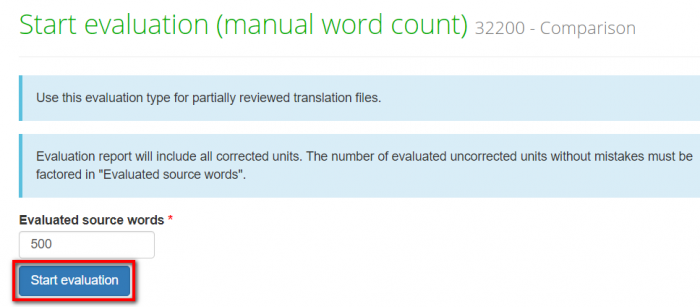
If this option is applied, all the corrected units will be displayed.
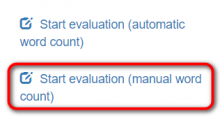
Click Start evaluation (manual word count):
Enter the number of evaluated source words:
Quality evaluation
In this step, the project evaluator has to select the sample for the quality assessment and classify every correction by type and severity.
1. Click the "Add mistake" button:
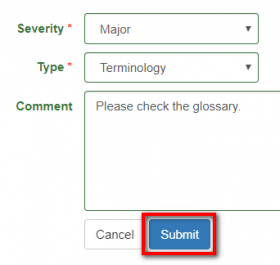
2. Add the information about the mistake and click "Submit":
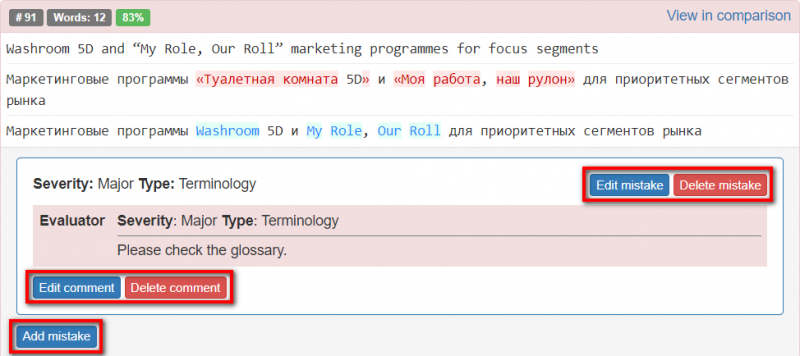
The evaluator can add mistakes, edit existing mistakes and comments or delete them by clicking the corresponding buttons:
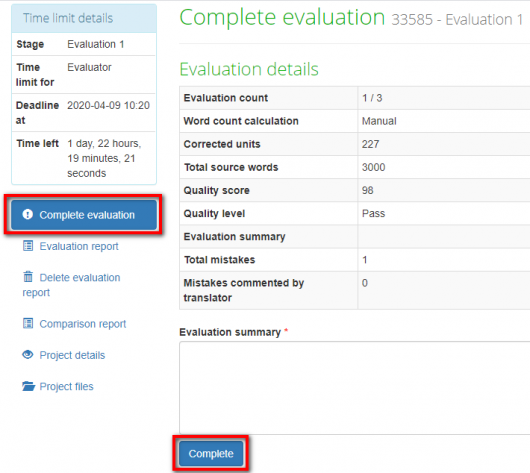
When the mistakes classification is done, the evaluator has to click "Complete evaluation", write an evaluation summary, and click the "Complete" button. Then, the translator will get a notification of evaluation completion and a quality assessment report.
Please note that any project participant can export the evaluation report.
![]() Back to the table of contents.
Back to the table of contents.
Complete evaluation
When all the mistakes are added and classified, click "Complete evaluation", write an evaluation summary, and click the "Complete" button. The translator will receive an email notification of quality evaluation completion and will be able to review the evaluation report.
![]() Back to the table of contents.
Back to the table of contents.
Translator's review
Once the translator receives the email notification of сomparison report creation, they can review all the corrections made by the reviewer.
When the evaluation report is created, the translator can review the mistakes classification.
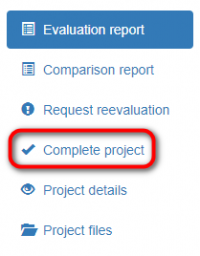
If the translator agrees with the mistakes classification, they click "Complete project". The project and its evaluation score will be finalized at this stage:
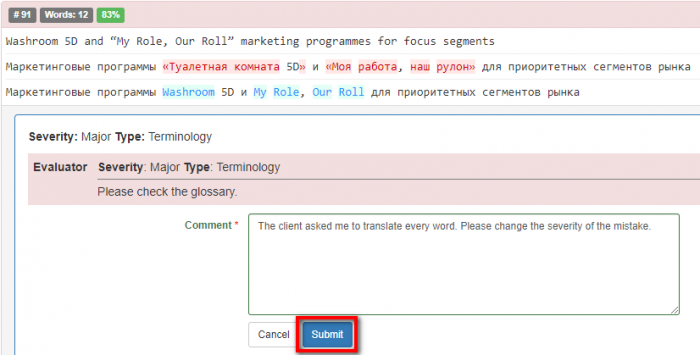
If the translator does not agree with the mistakes classification, they can ask the evaluator to decrease a mistake severity. To do so, they click "Add comment" in the box of the mistake, write a comment clarifying the matter and click "Submit":
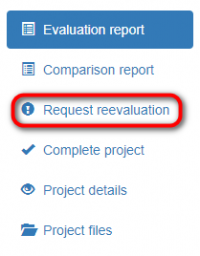
Once the translator enters all the comments, they request the reevaluation.
- Note: The ability to request the reevaluation (and how many times) depends on the account evaluation settings.
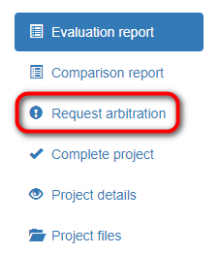
If the translator still does not agree, they can request arbitration (the corresponding button appears instead of "Request reevaluation"):
The arbiter will provide a final score that cannot be disputed.
Projects filters
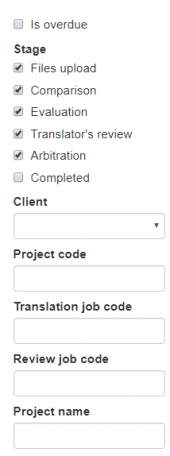
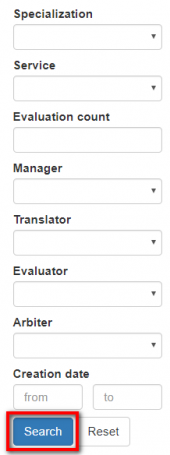
You can use filters on the "Projects list" page.
To sort the projects by the needed criteria, please click any column name highlighted in blue.
When the projects are sorted, you will see the arrow ![]() button next to the corresponding column name:
button next to the corresponding column name:
![]() Back to the table of contents.
Back to the table of contents.
Reports
You can generate various reports. Click the Reports menu on the top panel:
Users with the "translator" role can access only their individual translation quality reports.
Users with the "evaluator" role can access their individual translation quality reports and evaluator reports:
Users with the "manager" and "administrator" roles can access both their individual reports and other translators' and evaluators' reports.
The list of all available reports
- Average score reports. Here you may see the average reports: per translator and per translator company, per evaluator and per evaluator company, per manager and per manager company, per specialization.
- Translator reports. On this page, you will find information about every translator. For more details, please see the Translator report page.
- Evaluator reports. On this page, you will find information about every evaluator. For more details, please see the Evaluator report page.
- Translator company reports. On this page, you will find information about every translator company. For more details, please see the Translator company report page.
- Evaluator company report. On this page, you will find information about every evaluator company. For more details, please see the Evaluator company report page.
![]() Back to the table of contents.
Back to the table of contents.
System settings
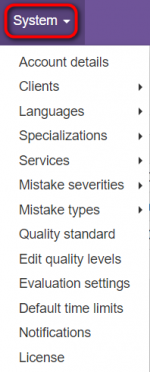
You can adjust account settings and specify system values in the "System" menu:
Each of these menu screens is described below.
Account details
On the Account details page you can change the company name or delete the account by pressing the corresponding buttons:
![]() Back to the table of contents.
Back to the table of contents.
Clients
The Client menu contains two submenus.
- Clients list — the list of your client where you can edit or delete them by pressing the corresponding buttons:
Note: You can’t delete a client connected with projects. Just select the unneeded client by pressing "Edit" and uncheck the "Enabled" box. It will not appear in the drop-down list anymore.
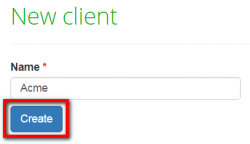
- New client — here you can add a new client by pressing the "Create" button:
![]() Back to the table of contents.
Back to the table of contents.
Languages
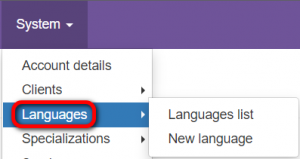
The languages' menu contains two submenus:
- Languages list — here you may view, edit or delete your language pairs by pressing the corresponding buttons:
- Note: You can’t delete a language connected with projects. Just select the unneeded language by pressing "Edit" and uncheck the "Enabled" box. It will not appear in the drop-down list anymore.
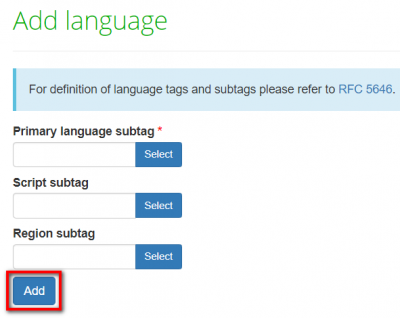
- New language — here you can add a new language pair by pressing the "Add" button:
Specializations
Specialization is a particular field that translation is focused on (an object of translation).
This menu screen contains two submenus. Each of them is described below.
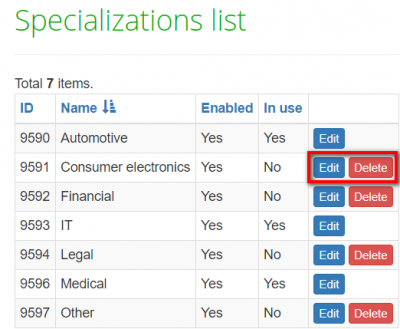
- Specializations list — here you may view, edit, and delete your specializations by pressing the corresponding buttons:
Note: You can’t delete specializations connected with projects. Just select the unneeded specialization by pressing "Edit" and uncheck the "Enabled" box. It will not appear in the drop-down list anymore.
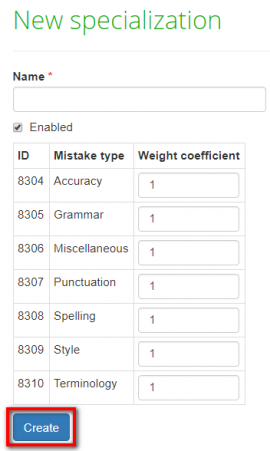
- New specialization — here you may add a new specialization by pressing the "Create" button:
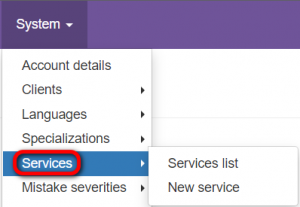
Services
The services' menu contains two submenus:
- Services list — here you can view, edit or delete services you provide by pressing the corresponding buttons:
- New service — here you can add new services by pressing the Create" button:
Mistake severities
Mistake severity is the gravity of mistake.
Go to System → Mistake severities:
This menu screen contains two submenus. Each of them is described below.
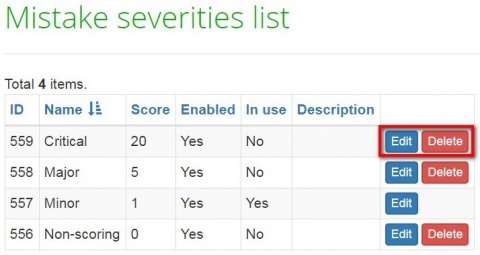
- Mistake severities list - here you may view, edit, and delete the mistake severities by pressing the corresponding buttons:
- Note: You can’t delete mistake severities connected with projects. Just select the unneeded mistake severity by pressing "Edit" and uncheck the "Enabled" box. It will not appear in the drop-down list anymore.
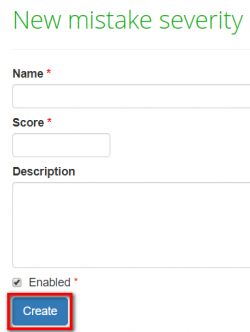
- New mistake severity - here you may add a new mistake severity by pressing the "Create" button:
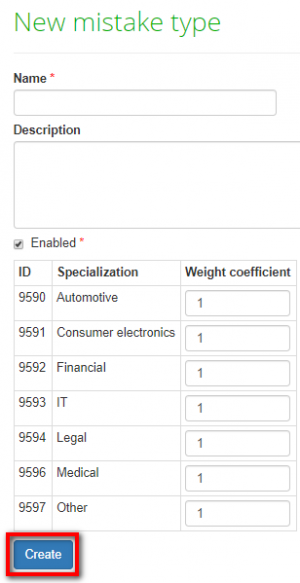
Mistake types
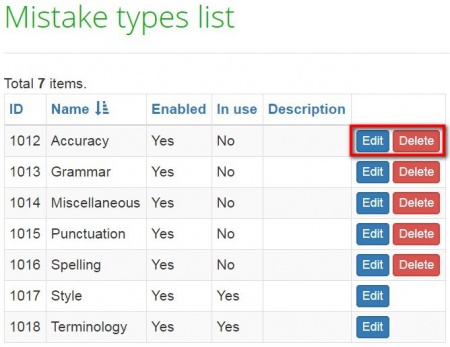
Mistake type is the kind of mistake. For example, Grammar, Punctuation, etc:
This menu screen contains two submenus. Each of them is described below.
- Mistake types list - here you may view, edit, and delete the mistake types by pressing the corresponding buttons:
- Note: You can’t delete mistake types connected with projects. Just select the unneeded mistake by pressing "Edit" and uncheck the "Enabled" box. It will not appear in the drop-down list anymore.
- New mistake type - here you may add a new mistake type by pressing the "Create" button:
Quality standards
By default, the system has predefined quality standards, i.e. types of mistakes, penalty scores etc., but you can change them to define your own corporate quality standards.
For more detailed information, please see the Quality standard page.
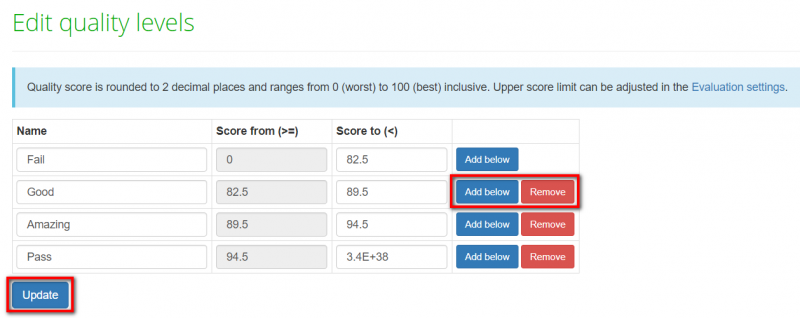
Edit quality levels
Here you may see the list of default quality levels proposed by the system.
You can update, remove, and add new quality levels by pressing the corresponding buttons:
- Note: You can’t remove quality levels connected with projects.
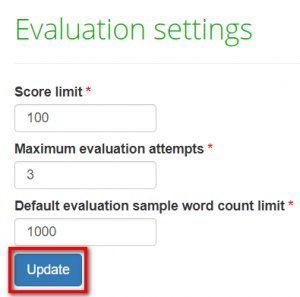
Evaluation settings
On the Evaluation settings page you may define score limit, maximum evaluation attempts and default evaluation sample word count limit by pressing the "update" button:
- Score limit — the maximum score your translations can get.
- Maximum evaluation attempts — here you may define, how many times translator may argue in discussion with evaluator. By default, translator may leave 3 comments. 2 times replies evaluator, but on the 3-rd time, arbiter replies and complete this discussion.
- Default evaluation sample word count limit — here you may define the number of words for evaluation (the system offers 1000 words by default).
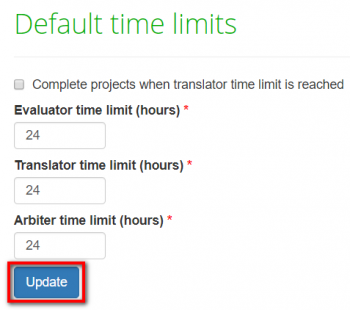
Default time limits
On this page you may define evaluator/ translator/ arbiter time limit by pressing the "Update" button:
Notifications
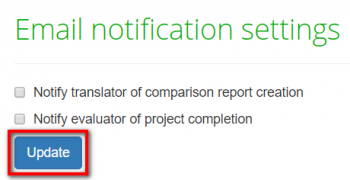
Here you can configure whether the system should send notifications of comparison reports creation to translators, and of projects completion to evaluators:
Enable or disable the corresponding notification, and press "Update" to save changes.
License
On this page, you may see your license details:
By pressing "Manage license" you can manage your license.
If any questions arise, please contact us.
Good luck!

