New project
From TQAuditor Wiki
New project page: cloud.tqauditor.com/project/create
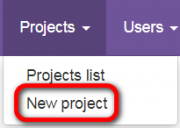
To create a new project, go to "Projects" → "New project":
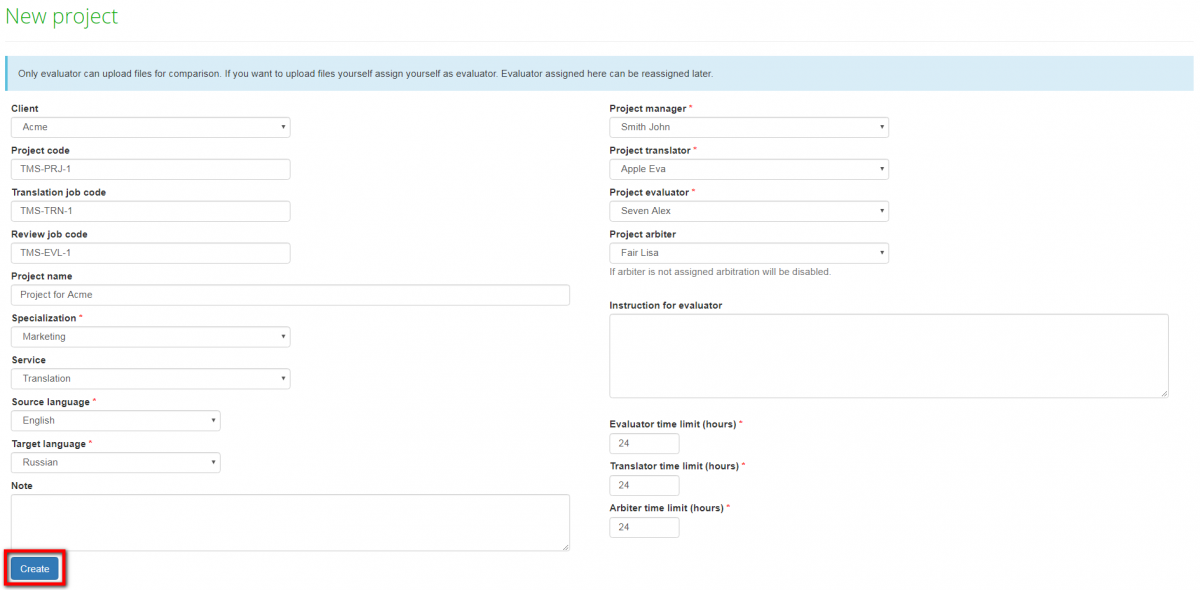
Fill in the blank and click the "Create" button:
- "Client" — select a client (to add clients, go to: "System" → "Clients" → "New client").
- "Project code" — the project ID in a translation management system entered by the manager.
- "Translation job code" — the translation job ID in the TMS entered by the manager.
- "Review job code" — the review job ID in the TMS entered by the manager (differs from the translation job code).
- "Project name" — here you may enter a name for the project.
- "Specialization" — select a translation specialization (to create it, go to: "System" → "Specialization" → "New specialization").
- "Service" — here you may select a service (to create it, go to: "System" → "Services" → "New service").
- "Source language" — the language being translated from.
- "Target language" — the language being translated to.
- "Note" — here you may leave additional information on the project.
- "Project translator" — the user that performs translations (can be assigned to a user with any role).
- "Project evaluator" — the user that evaluates translations (can be assigned to everyone, excluding translator). Project translator cannot be the same person as project evaluator.
- "Project arbiter" — the user that becomes a judge between translator and evaluator in controversial situations. The Arbiter’s decision about evaluation is final (can be assigned to everyone, excluding translator).
- "Instruction for evaluator" — the manager may leave additional information for evaluator here.
- "Evaluator/translator/arbiter time limit" — here you may adjust time limits for the actions required from the corresponding project participants (define the maximum duration of each project stage).
- Note: The manager may assign themselves as the project translator, evaluator or arbiter.
After you clicked "Create", the new project appears in the list. To see project details, click on the project ID:


